
The first-run setup
The screens you see the first time the app opens: a four-step welcome for your business details, then a three-step setup for how your invoices look. Both can be skipped and changed later.
#Step 1 of the welcome: where you invoice from
The first screen explains what the app does, and asks Where will you be invoicing from?
A small Safe and private box on it sums up how your data is kept: on this computer, with no account, working offline, with no tracking. Its How we keep it safe link opens Is it safe? Security and privacy.
| 🇮🇳 India | GST, GSTR-1 and 3B, UPI. The default. |
| 🌍 Outside India | VAT and other local taxes |
| 🌐 Both | India, with clients abroad |
Get Started carries on. Skip Setup goes straight to the app; fill in Settings later.
#Step 2: business details
These print at the top of every invoice. Only the Business Name is required.
| Business Name | Required |
| Address | Your full address |
| State | Needed to work out CGST and SGST versus IGST |
| GSTIN | Leave blank if you are not registered |
| PAN, Phone, Email | Optional |
Next stays greyed out until a Business Name is typed. Back returns to the first screen without losing what you typed.
State is where your business is registered. The app compares it with each client's state: same state means CGST + SGST, a different state means IGST. A wrong state here makes the tax wrong on every invoice.
GSTIN is your 15-character GST number, for example 07ABCDE1234F1Z5. Its first two digits are your state code. Not registered for GST? Leave it blank; you can make bills without GST. Everything here can be changed later in Settings → Company details.
Not sure whether you need GST registration, or which scheme to choose? See GST basics: do I need GST registration?
#Step 3: bank and UPI
Where clients should pay you: bank name, account number, IFSC code and UPI ID. A UPI ID puts a scan-to-pay QR code on your invoices. You can also upload your logo and signature here, up to 500 KB each, and choose Show my business name and logo in the app's menu (ticked to start; change it any time in Settings → Company → Branding). Skip, I’ll add later leaves it all for Settings.
"Image must be under 500KB". The logo or signature file is too big. Open it in Paint (or any photo app), make it smaller, save it as PNG or JPG, and choose it again.
A typing mistake in the account number or IFSC. Check them against your passbook or cheque book; they print on every invoice. You can correct them later in Settings → Payment accounts.
#Step 4: you're all set
A short list of what to do next: make your first invoice, download or share it, check the GST reports, and file your returns. Start Billing saves everything; your bank details become your first payment account. You see Setup complete! Start creating invoices. and the app opens.
If you see Failed to save. Try again., the app's engine stopped: check it is still running (see Failed to fetch) and click Start Billing again.
Next: make your first invoice.
#Then: setting up your invoices
Next, a three-step window sets up printing.
- What kind of business do you run?Pick one: Retail shop / kirana, Freelancer / consultant, Restaurant / cafe, Wholesale / trading, Manufacturing, Service / repair shop, or Everything. It decides which features the app shows: a freelancer, for example, does not see Products or Purchases. See Business type for what each one shows and hides; nothing is deleted, and you can change it any time in Settings. It also sets an invoice style to match (see Print and PDF: business type). Or choose None of these to keep every feature as it is and set things up yourself.
- Paper size and languagePick what you mostly print on: A4, A5, 80 mm or 58 mm thermal. It becomes the paper size of new invoices. Then the language for section labels such as BILL TO: English, Hindi, Tamil, Marathi or Bengali.
- Ready to goA summary of your choices. Finish setup applies them.
Skip setup, or the ✕, closes it. A ✨ Finish setup button then waits at the bottom right of the screen, for whenever you want to come back to it. Everything it sets can also be changed in Print and PDF settings.
The top of the window shows Step 1 of 3 and a bar that fills as you go. Continue moves on, Back goes back without losing your choices.
#What kind of business do you run?
Click the card that fits you best; it turns blue. Each card has a one-line hint:
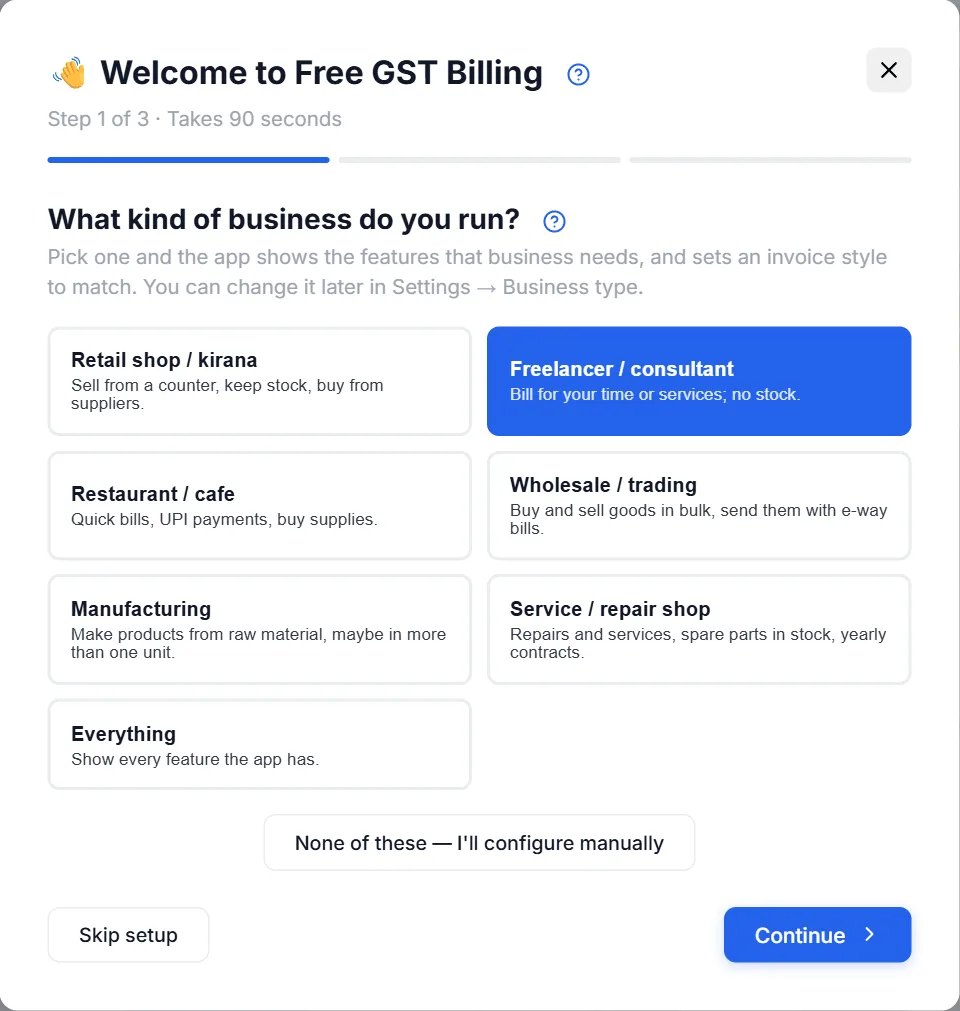
| Card | For |
|---|---|
| Retail shop / kirana | Selling from a counter, keeping stock, buying from suppliers. |
| Freelancer / consultant | Billing for your time or services, no stock. |
| Restaurant / cafe | Quick bills, UPI payments, buying supplies. |
| Wholesale / trading | Buying and selling goods in bulk and sending them with e-way bills. |
| Manufacturing | Making products from raw material. |
| Service / repair shop | Repairs and services, spare parts in stock, yearly contracts. |
| Everything | Every feature the app has. |
Your choice decides which screens the sidebar shows and sets a matching invoice style. Hidden screens are only hidden: nothing is deleted, and you can switch any feature back on later in Settings → Features or change the type in Settings → Business type.
None of these — I'll configure manually closes the window at once and changes nothing: every feature stays as it is, and the ✨ Finish setup button does not appear.
Pick the one closest to what you do most. A shop that also repairs things can pick Retail shop / kirana. If you want to see everything first, pick Everything and hide what you do not use later.
#Paper size + language
Paper size: what you mostly print on. It becomes the paper size of every new invoice; you can still change it on any one invoice.
| A4 · Standard | Normal office paper and laser or inkjet printers. The usual choice. |
| A5 · Compact | Half of A4. For short bills. |
| 80mm Thermal | The common shop receipt printer (about 8 cm wide roll). |
| 58mm Thermal | Small receipt printers (about 6 cm wide roll). |
Not sure which thermal printer you have? Measure the paper roll, or see Thermal printing.
Section label language: the language of the printed headings such as BILL TO and TOTAL: English, हिन्दी (Hindi), தமிழ் (Tamil), मराठी (Marathi) or বাংলা (Bengali). Your item names, addresses and the rest stay exactly as you type them; the app's own screens stay in English.
#Ready to go
A summary of the three choices: Business type, Default paper size and Section label language. Check them, then click Finish setup. You see Setup complete! Your defaults are configured. and land on the Dashboard. Your next new invoice uses these settings.
A screen I need is missing from the sidebar. Your business type hid it. Turn it back on in Settings → Features.
Invoices print on the wrong paper. Change the paper size on the invoice (Paper / print size), or the default in Print and PDF settings.